How to Use Ethio Telecom Webmail: Step-by-Step User Guide
This step-by-step guide will help you understand how to access and manage your Ethio Telecom Webmail account. Whether you’re logging in for the first time, checking your inbox, composing new emails, or managing folders like Drafts, Sent, Trash, and Spam — this knowledge base article walks you through each feature with clear explanations and helpful tips. Ideal for beginners and everyday users alike, this guide ensures you get the most out of your Ethio Telecom email experience.
Step 1: Log In
- Open a new tab in your web browser.
- Type the following URL in the address bar: 👉 https://mail.ethionet.et/
- You will see the login page (see Image 01).
- Enter your email address and password.
- Click Login.
- If your credentials are correct, you will be redirected to your inbox view (see Image 02).
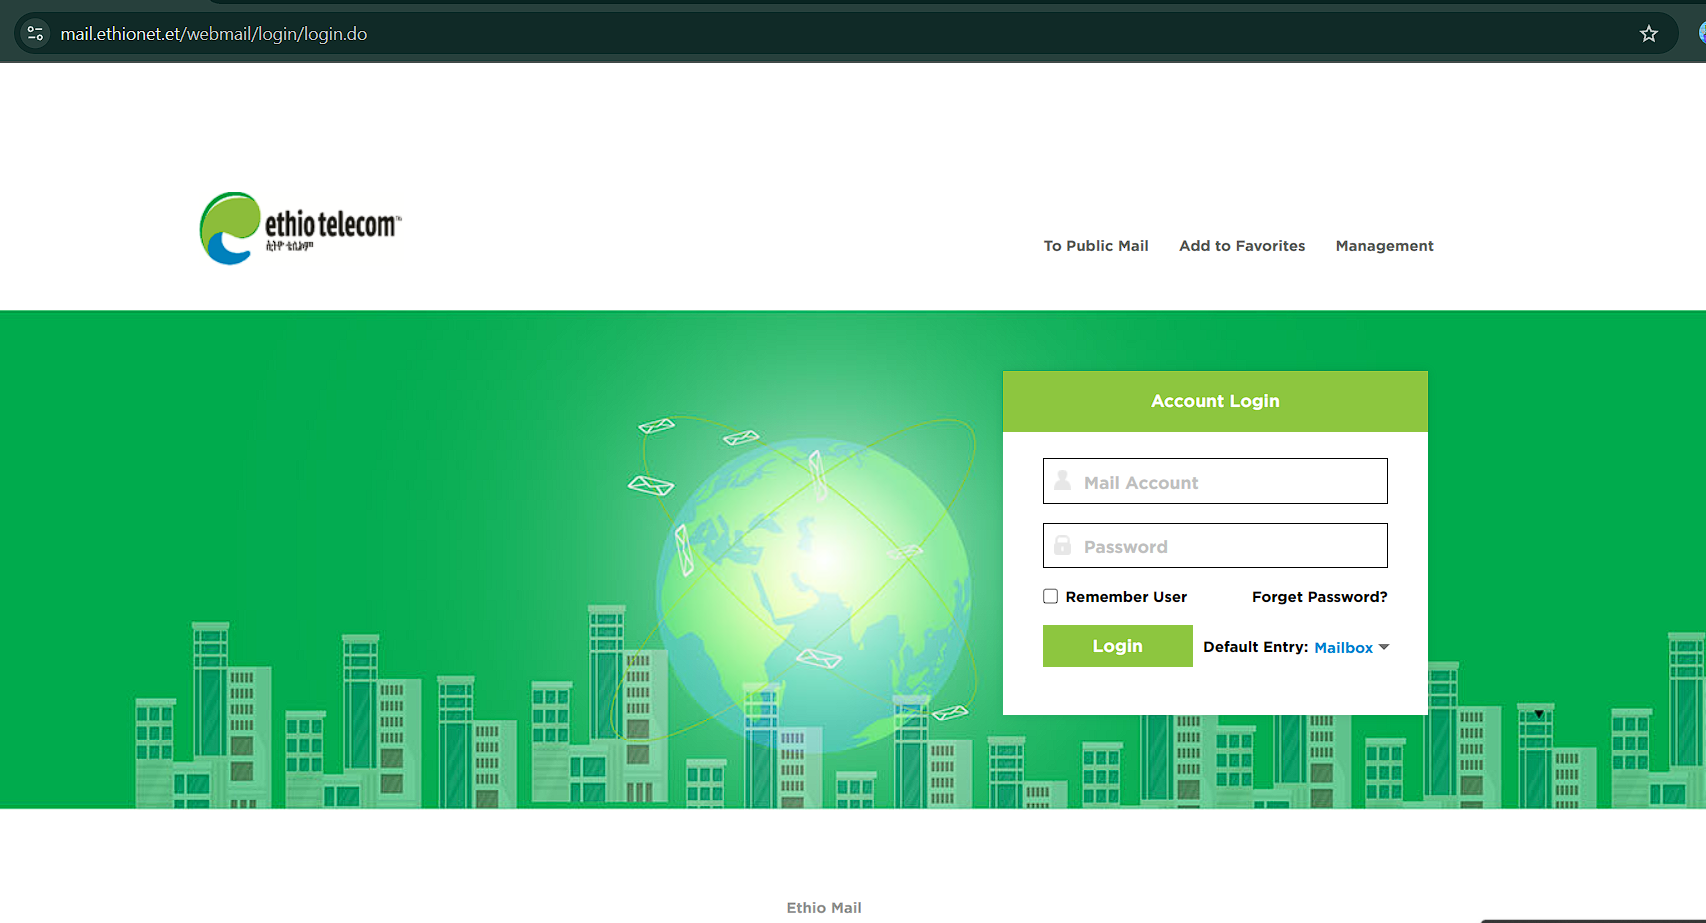
Image 01. Login page
Step 2: Understand the Inbox
- Once you’ve successfully logged in, you’ll be taken to your Inbox — this is where all incoming emails are displayed.
- The Inbox is your main email folder where you receive new messages.
- Every time someone sends you an email, it will automatically appear here.
- You can read, reply to, forward, or delete emails directly from this screen.
- Note: If there are no messages yet, you will see the text "There is no email" (as shown in Image 02). Once you receive messages, they will be listed with details like sender, subject, date, and size.
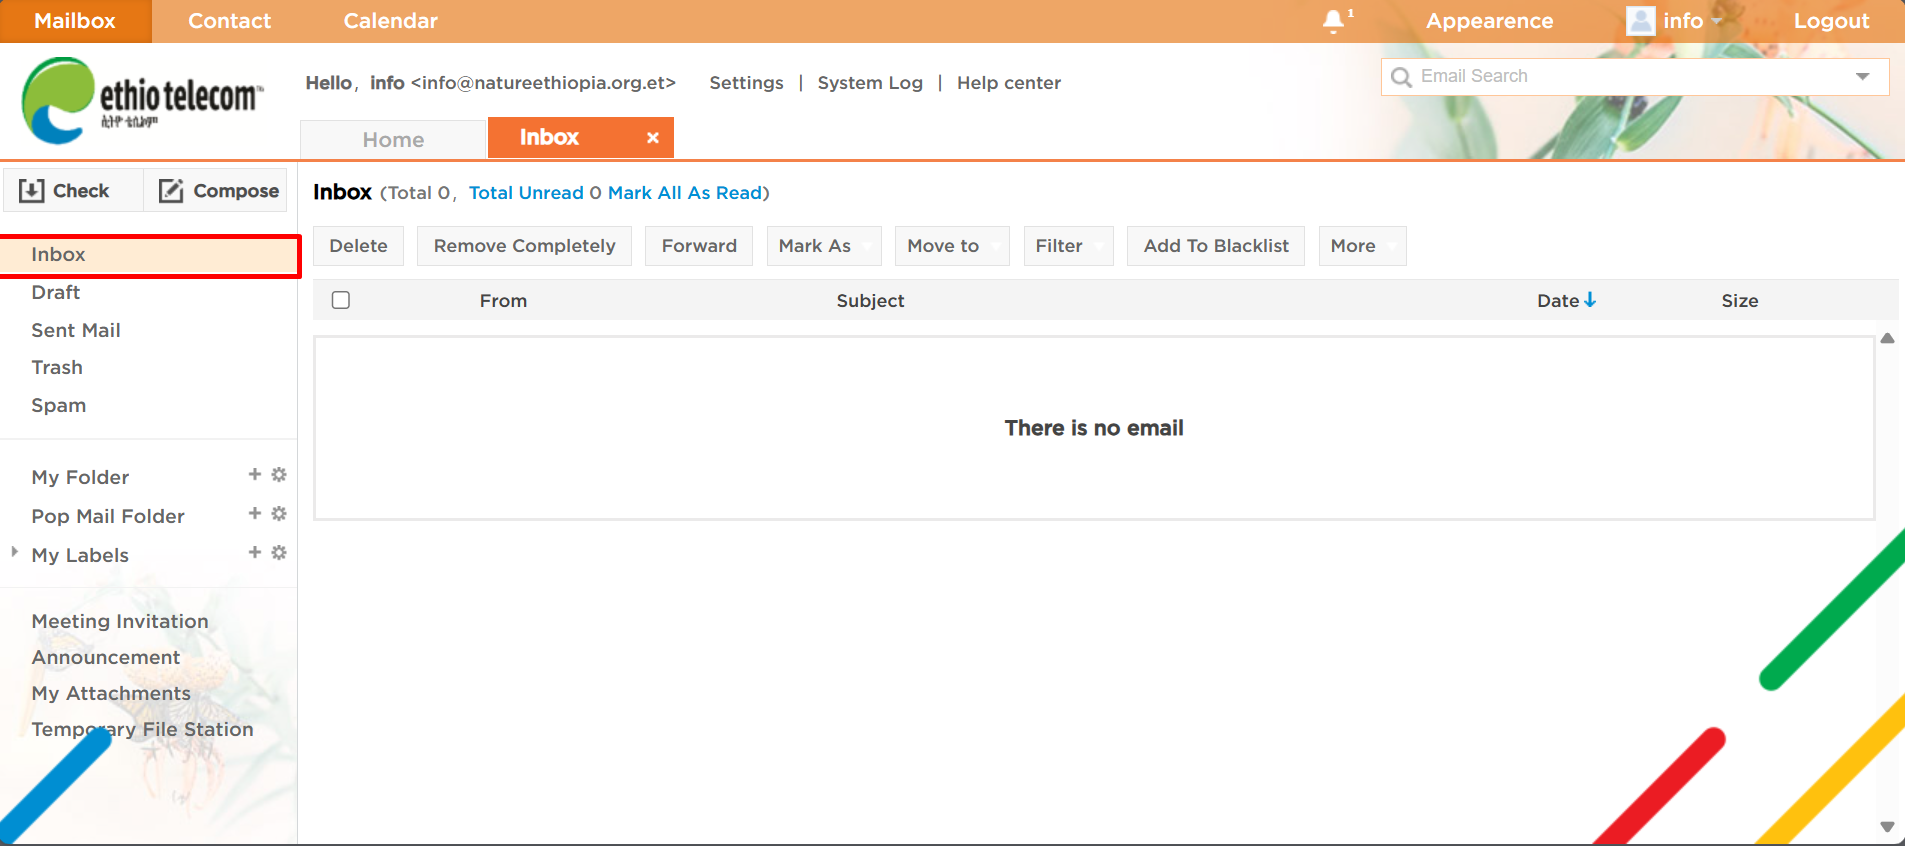
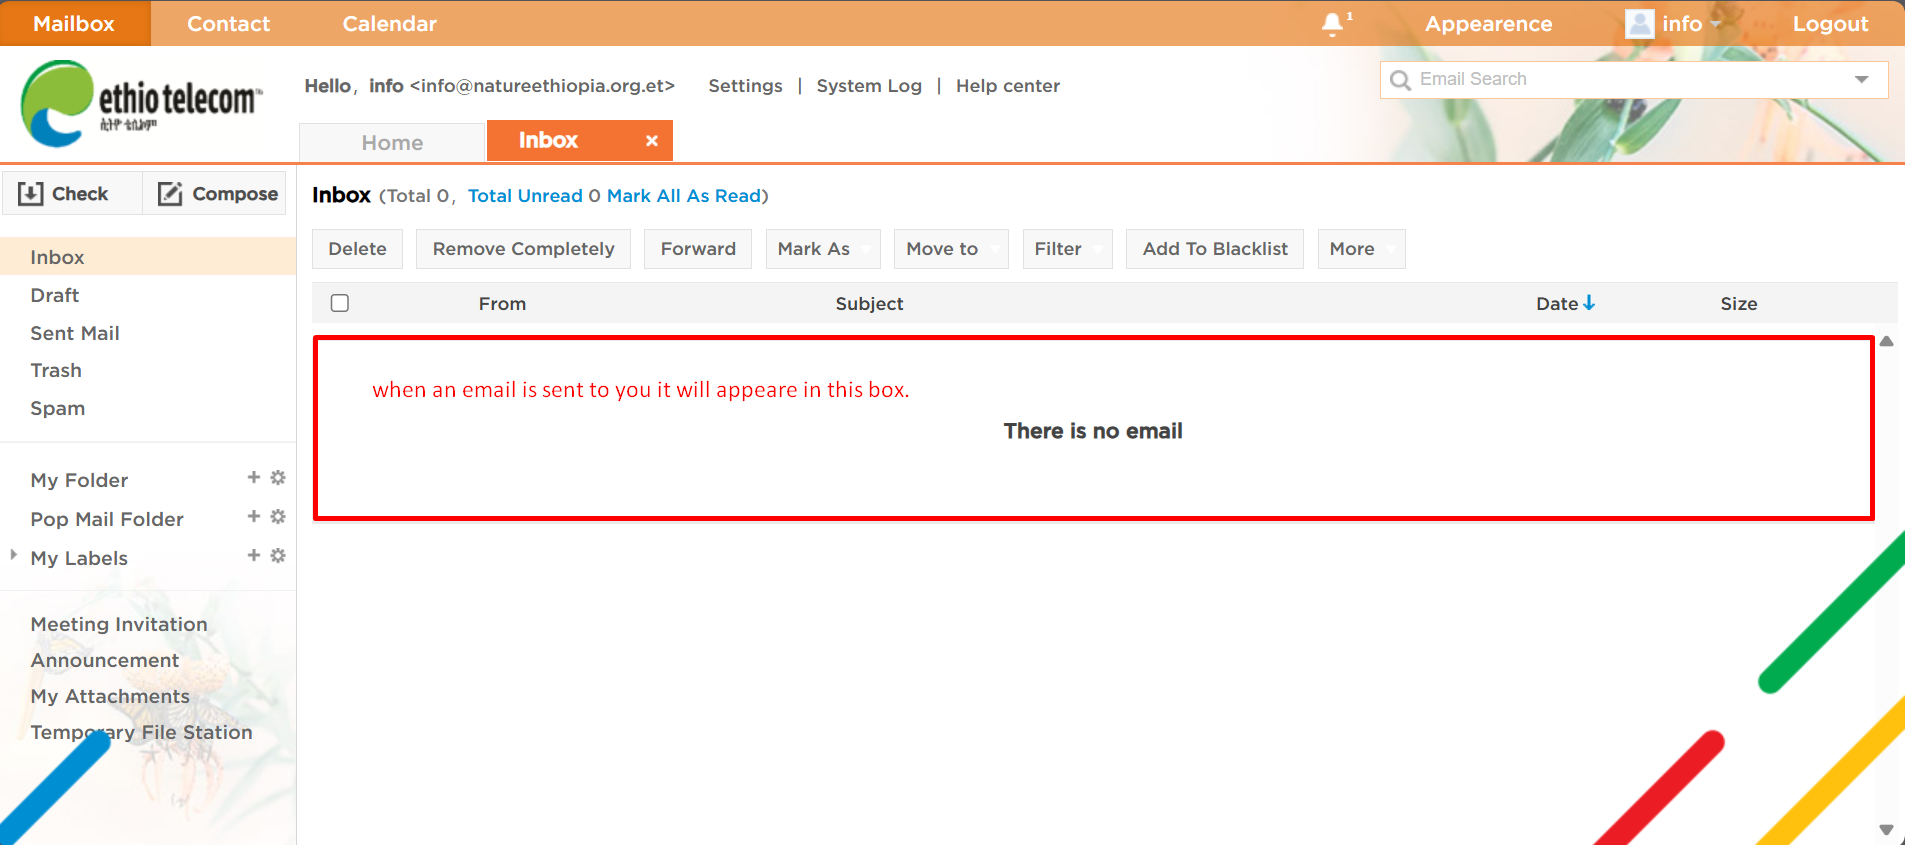
Image 02. Inbox page
Step 3: What is the Draft Folder?
- The Draft folder stores emails that you started writing but haven’t sent yet.
- A draft is automatically saved when you're composing an email but haven’t clicked Send.
- You can manually save a draft if you want to continue writing the email later.
- How to Use It:
- Go to the Draft folder from the left-hand menu.
- Click on any draft to open and continue editing.
- When you're ready, click Send to deliver the email to the recipient.
- This feature is especially useful when you’re interrupted or need time to revise your message before sending.
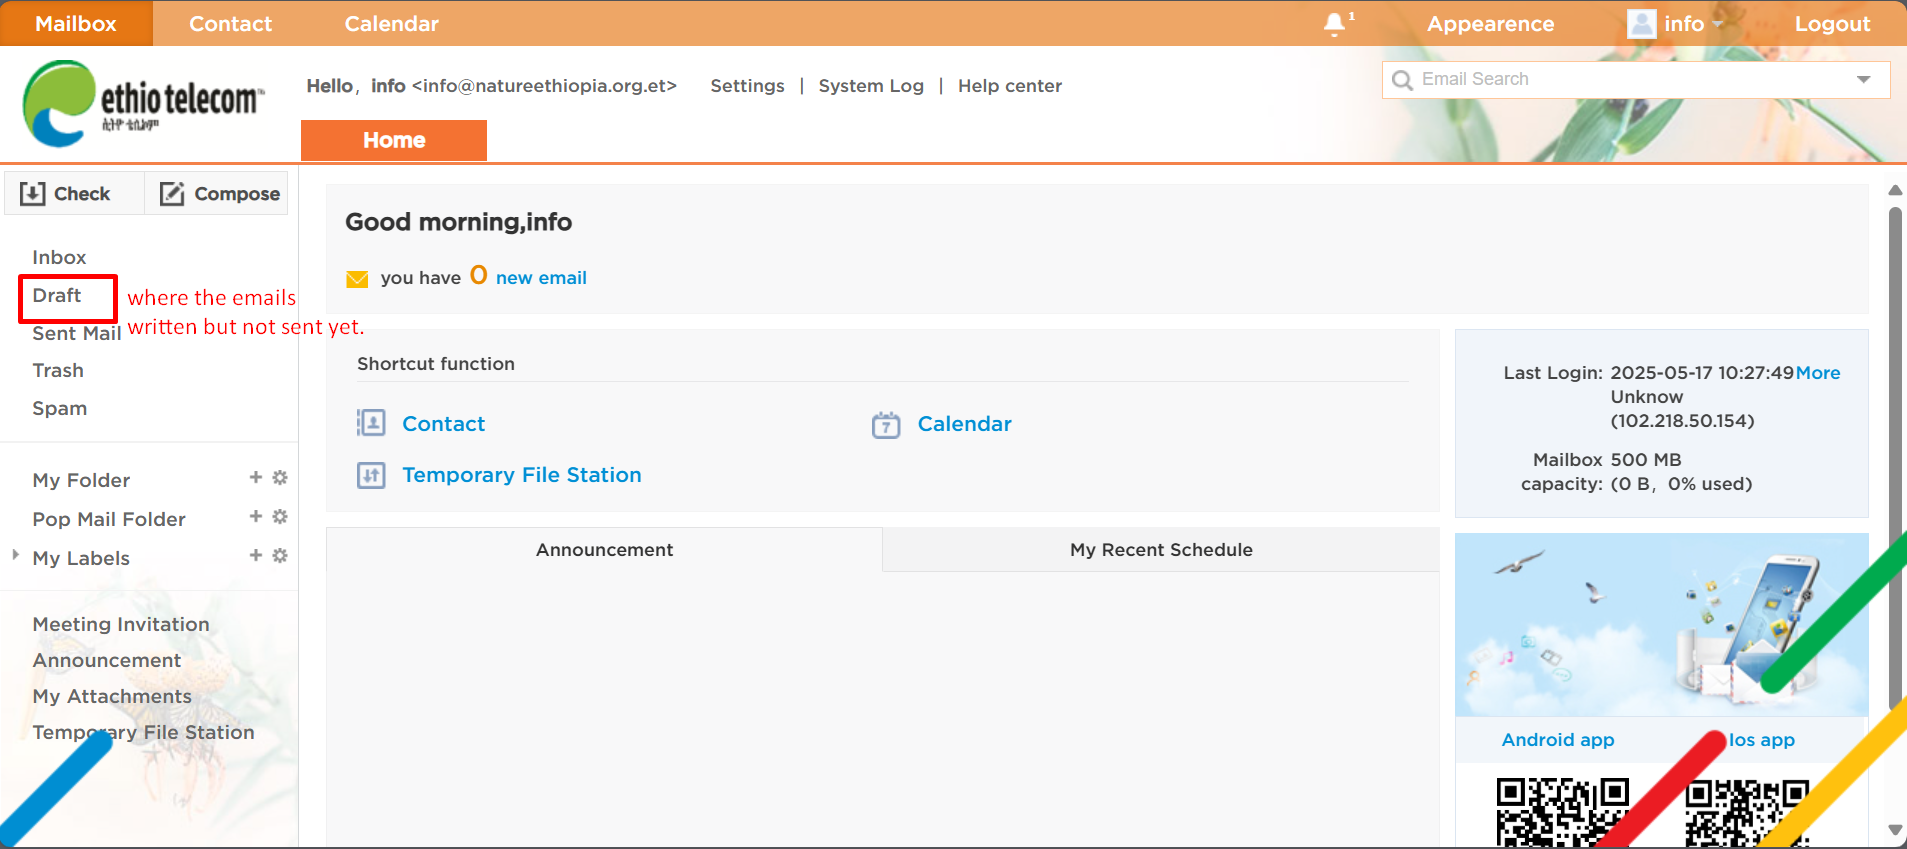
Image 03. Draft page
Step 4: What is the Sent Mail Folder?
- The Sent Mail folder stores all the emails you have successfully sent from your account.
- What You Can Do in Sent Mail:
- View the messages you’ve sent along with the recipient, subject, and date.
- Open any sent email to review the content or confirm delivery.
- You can also forward, print, or move sent messages to other folders.
- Note: Emails will only appear in the Sent Mail folder after they have been successfully sent.
- This is useful when you need a record of your communication or to verify that an email was delivered.
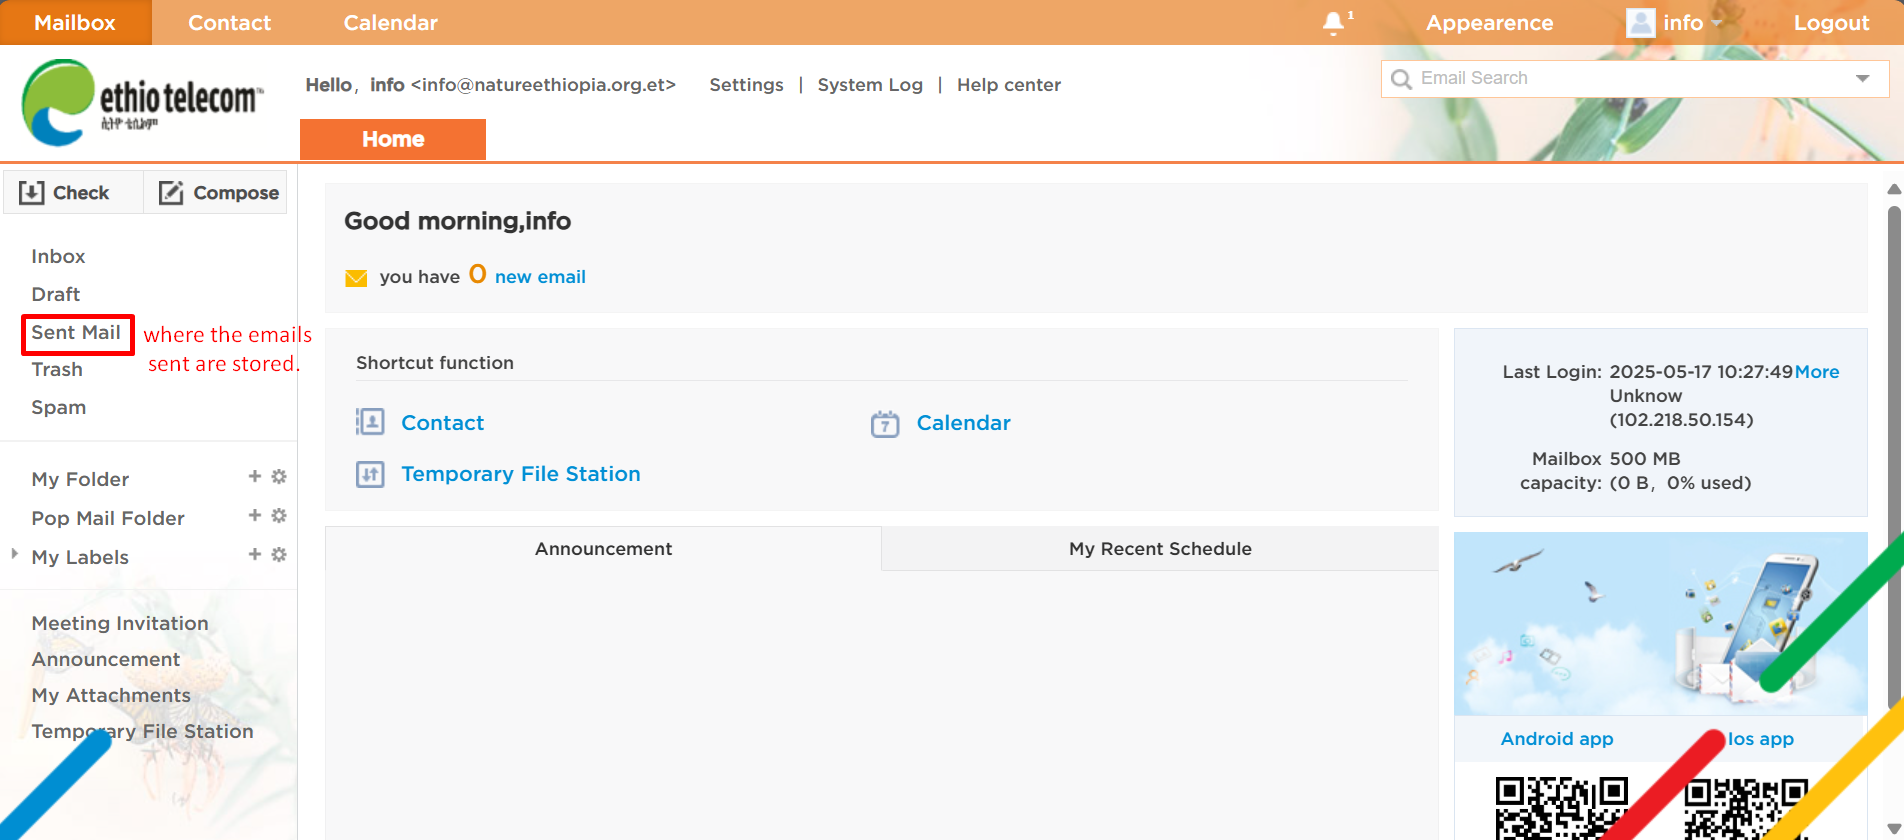
Image 04. Sent Mail page
Step 5: What is the Trash Folder?
- The Trash folder holds all the emails that you have deleted from your inbox or other folders.
- 🗑️ Key Points About Trash:
- When you delete an email, it moves to the Trash folder instead of being permanently erased.
- Emails in the Trash can be:
- Restored back to your Inbox or other folders if needed.
- Permanently deleted from your account.
Important:
- Emails in the Trash may be automatically removed after a certain period (depending on system settings).
- Always check your Trash before permanently deleting items to avoid accidental data loss.
Use this folder to recover mistakenly deleted emails or clean up your mailbox.
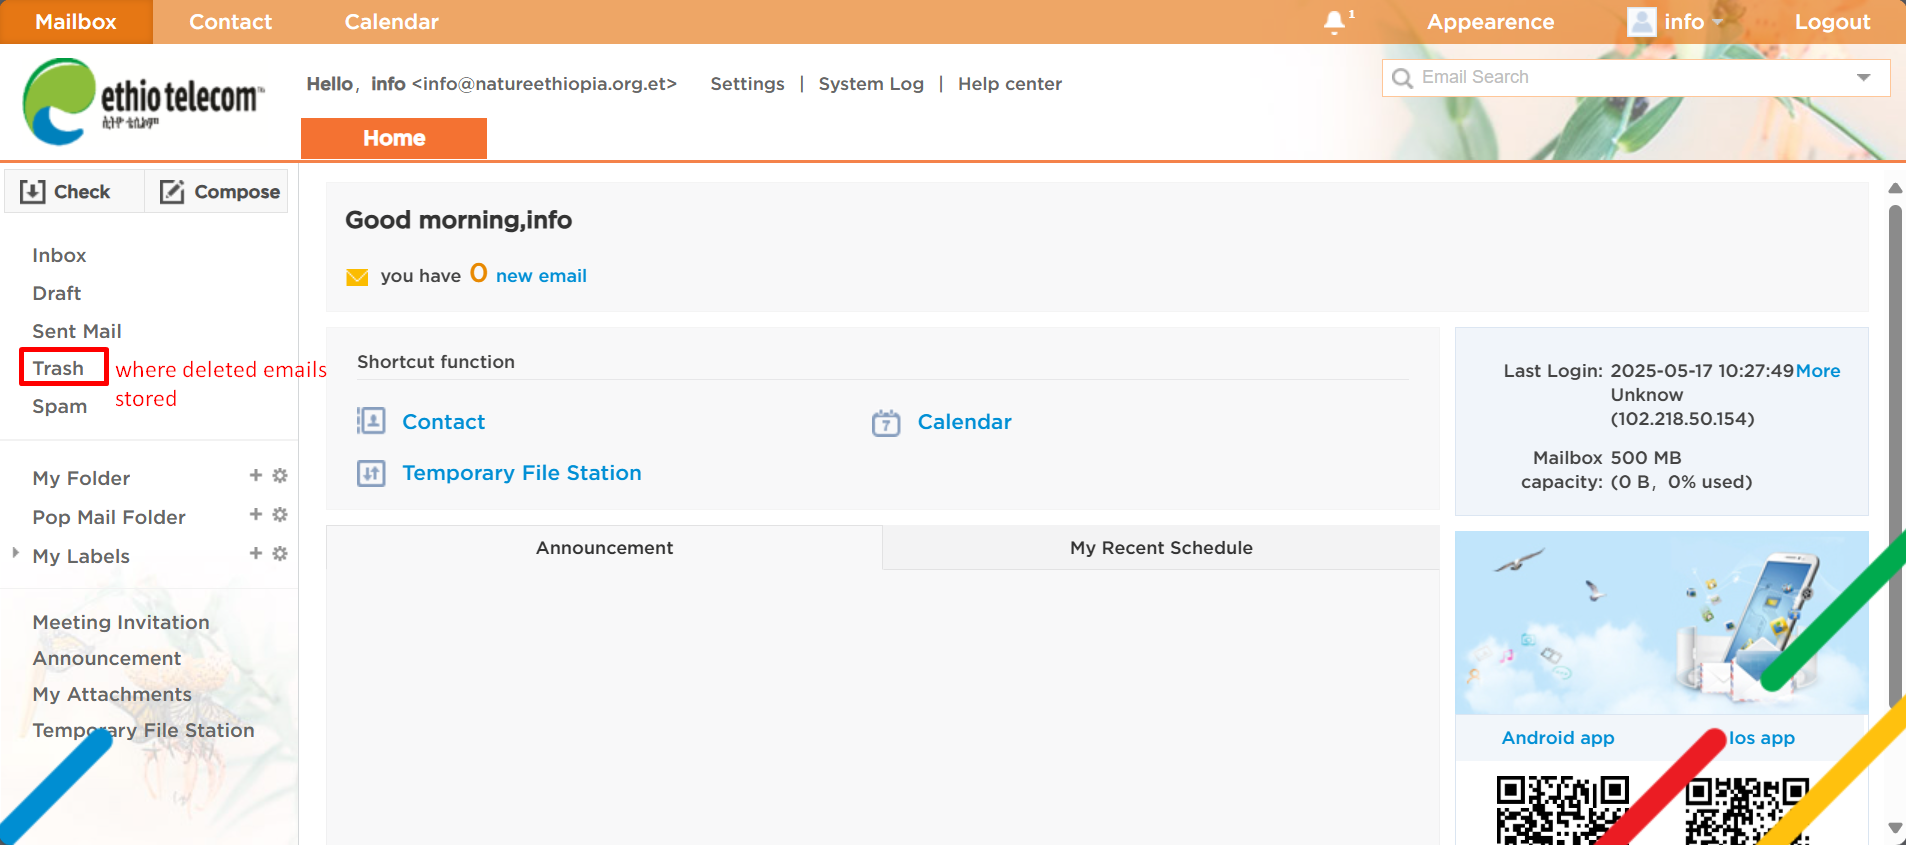
Image 05. Trash page
Step 6: What is the Spam Folder?
The Spam folder stores unwanted or suspicious emails, often referred to as junk mail.
- What Goes Into Spam?
- Emails that are identified as potentially harmful, unsolicited, or commercial ads not recognized by your system.
- Messages from unknown or untrusted sources.
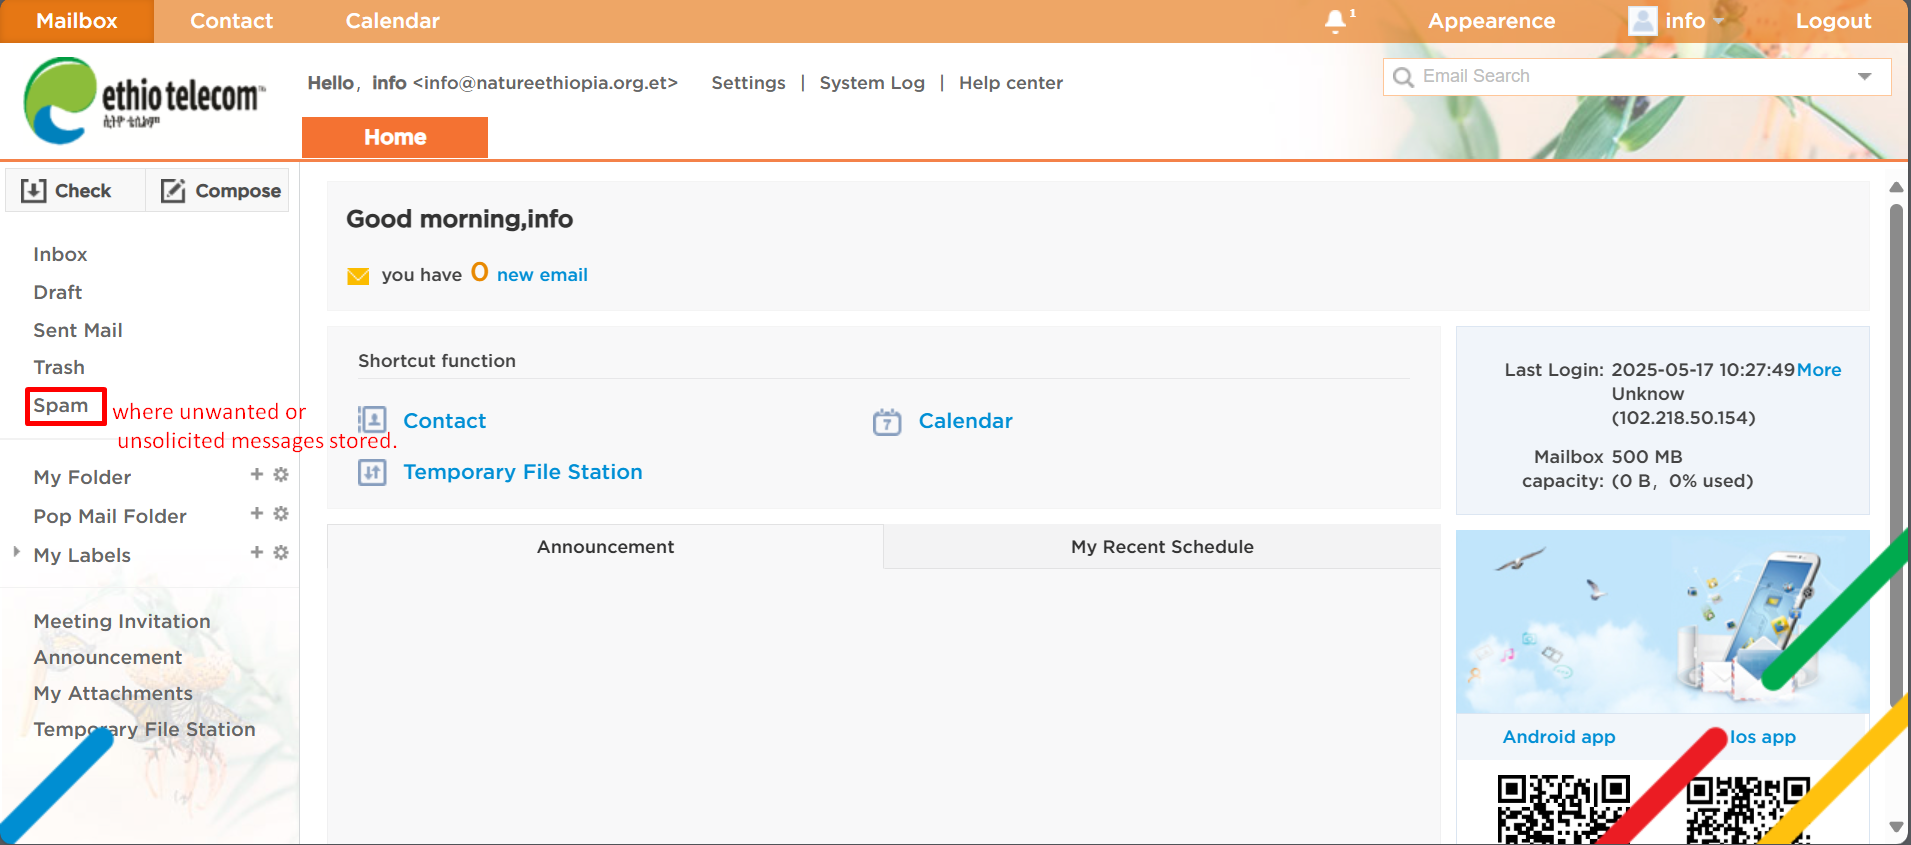
Image 06. Trash Page
Step 7: How to Compose an Email
The Compose button allows you to create and send a new email.
How to Compose an Email:
- Click the Compose button at the top left of your mailbox.
- Click on Inbox in the left sidebar if it’s not already selected.
A new window will open where you can fill in:
- To: Enter the recipient’s email address.
- Subject: Enter the topic or title of your email.
- Message Body: Type your main message.
You can also:
- Add attachments (e.g., documents or images).
- Use formatting tools to style your text.
Once done, click the Send button.
Additional Options:
- Click Save as Draft if you’re not ready to send it yet.
- Use CC/BCC to send copies to additional recipients.
Use this feature to communicate clearly and professionally with internal or external contacts.

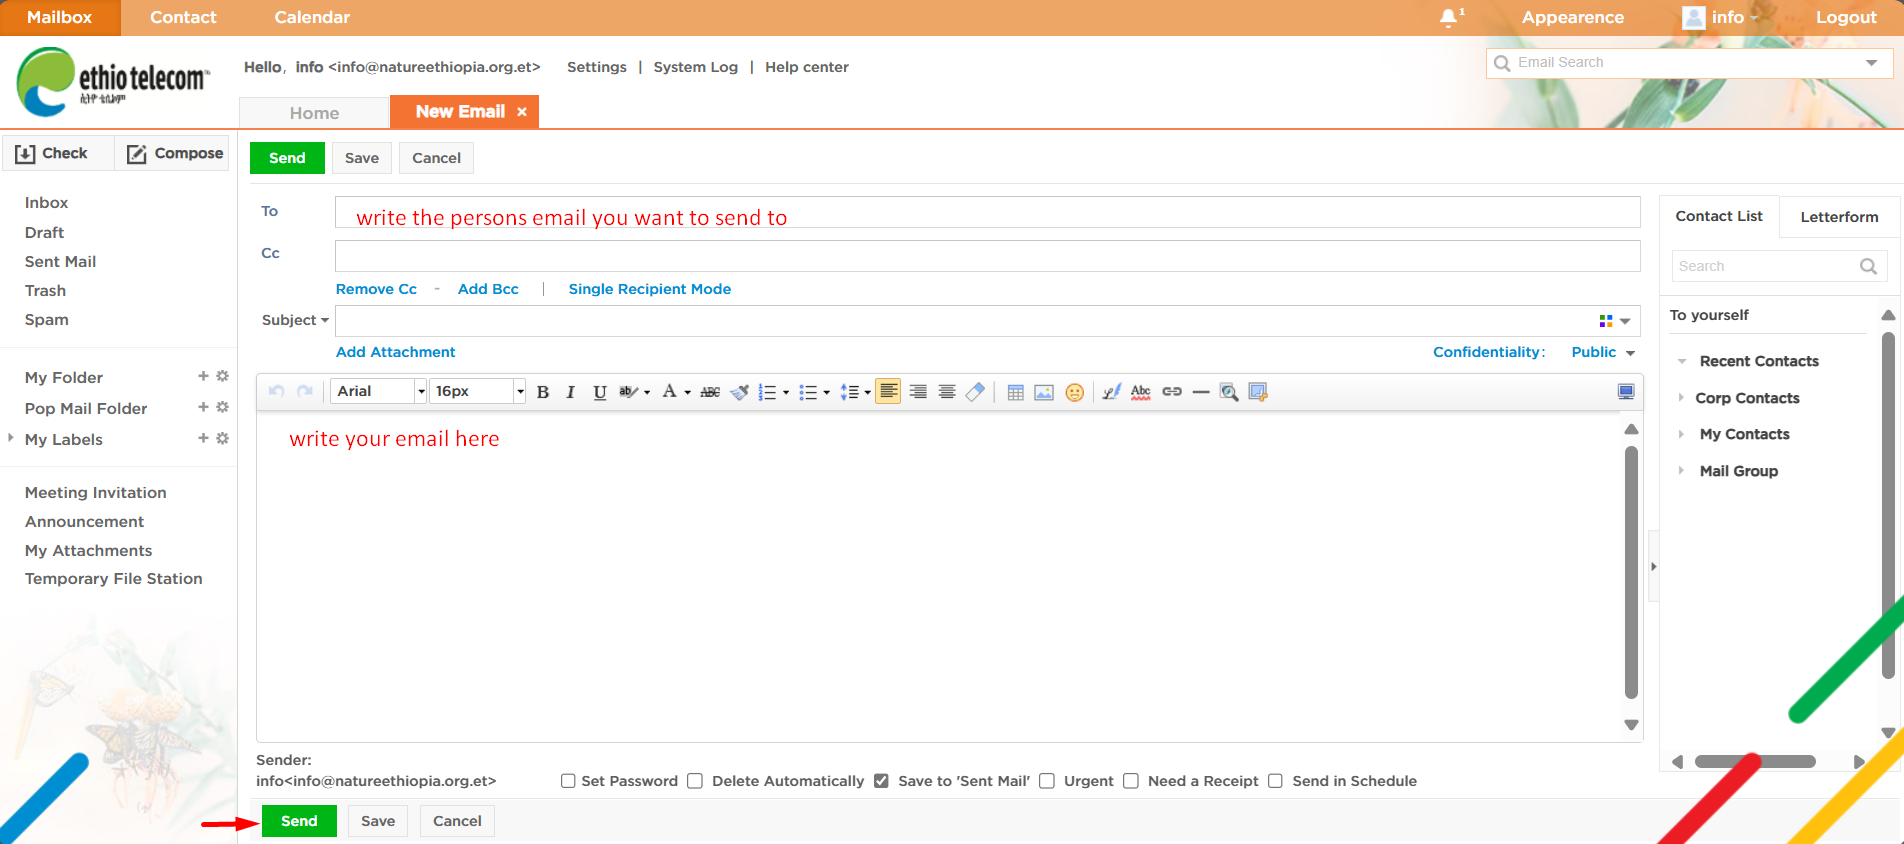
Image 07. Compose email page
Step 8: What is the Meeting Invitation Section?
The Meeting Invitation section displays any meeting requests sent to your email account.
What You Can Do Here:
- View invitations to scheduled meetings or events sent by others.
See details such as:
- Date and time
- Subject or agenda
- Location (if any)
- You can Accept, Decline, or Tentatively Accept invitations.
Notifications:
- You may receive a pop-up reminder or email notification for upcoming meetings.
- Accepted invitations may be added to your Calendar (if integrated).
Use this feature to keep track of meetings and respond promptly to invitations.

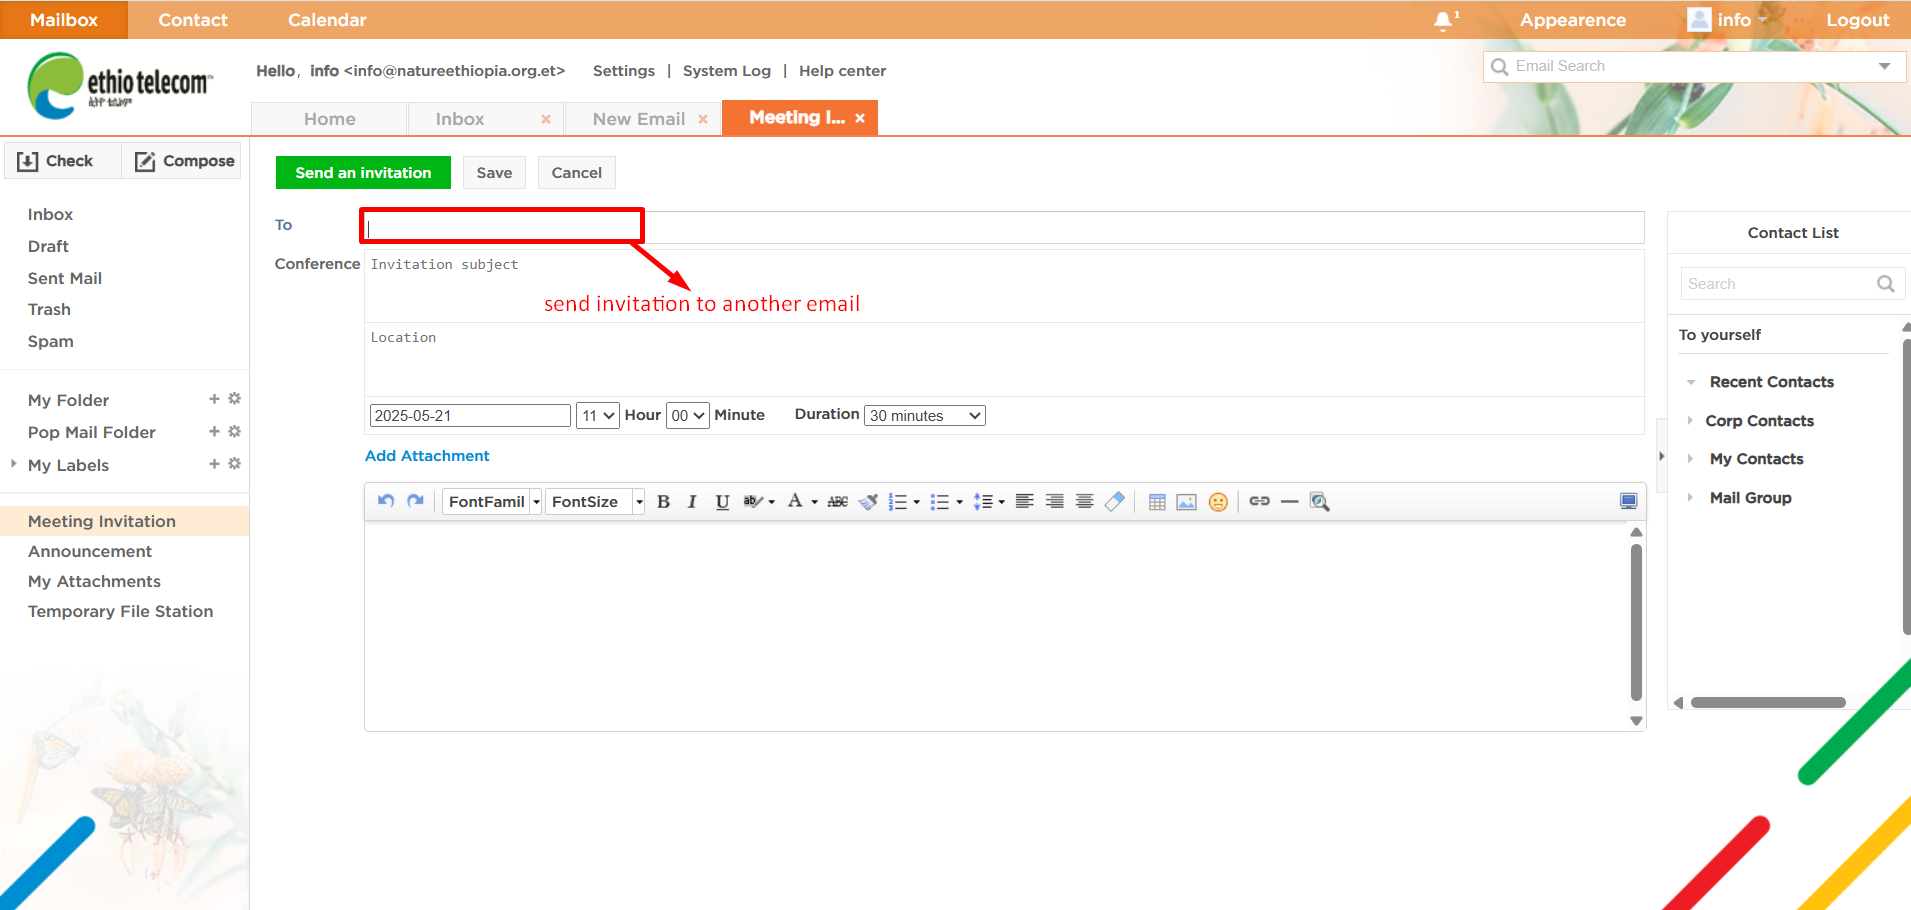
Image 08. Meeting Invitation page
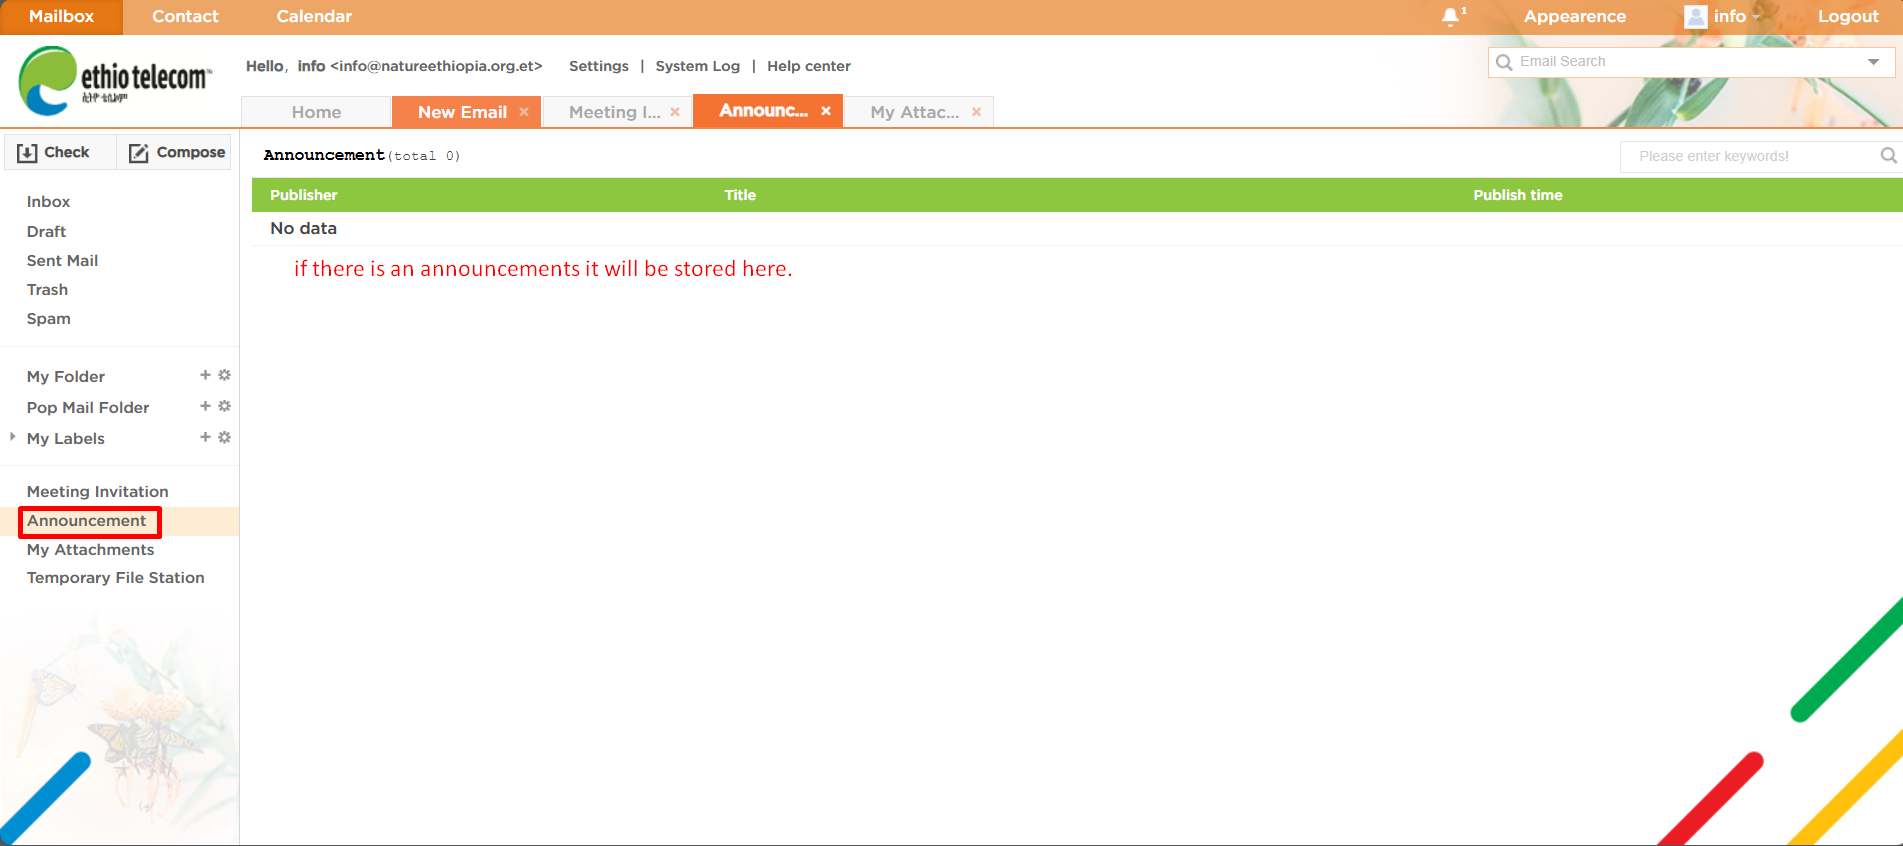
Step 9: What is the Announcements Section?
The Announcements section is where you receive important messages or updates from your email service provider or system administrator.
What You’ll Find Here:
- System-wide messages such as:
- Scheduled maintenance notices
- Service interruptions
- Policy updates
- New feature releases
Internal company notices, if enabled (like HR or IT notifications)
🔍 Why It Matters: